Sub Flows
Messagingme.app offer 3 different type of flows.
| Flow Type | Description |
|---|---|
| Normal Subflow | Varies in channels, basic subflow |
| Workflow | work at the backend without influencing the front end task |
| Function Flow | perform repetitive tasks |
Workflow
Workflow is better for running some actions in background process, such as sending data to external request for tracking, which may take a few seconds to complete, and the response is not required for the next message sent to bot user.
You will not be able to use any send message or ask questions to bot user inside workflow.
A workflow can be considered as a backend flow where you can automate tasks such as adding or removing tags, set custom field variables, do external API calls.
This way the conversation you have with the subscriber will not be affected by needing to wait to apply all those actions and the experience is as smooth as possible for that end-user.
Create Workflow
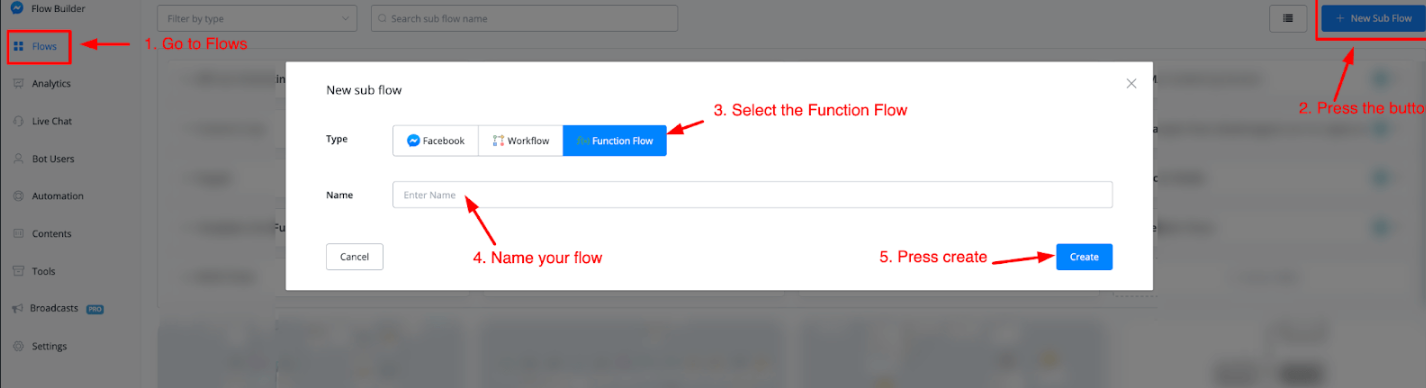
To create a workflow just go to the flow overview by selecting Flows from the left-hand menu.
Then press the button + New Sub Flow
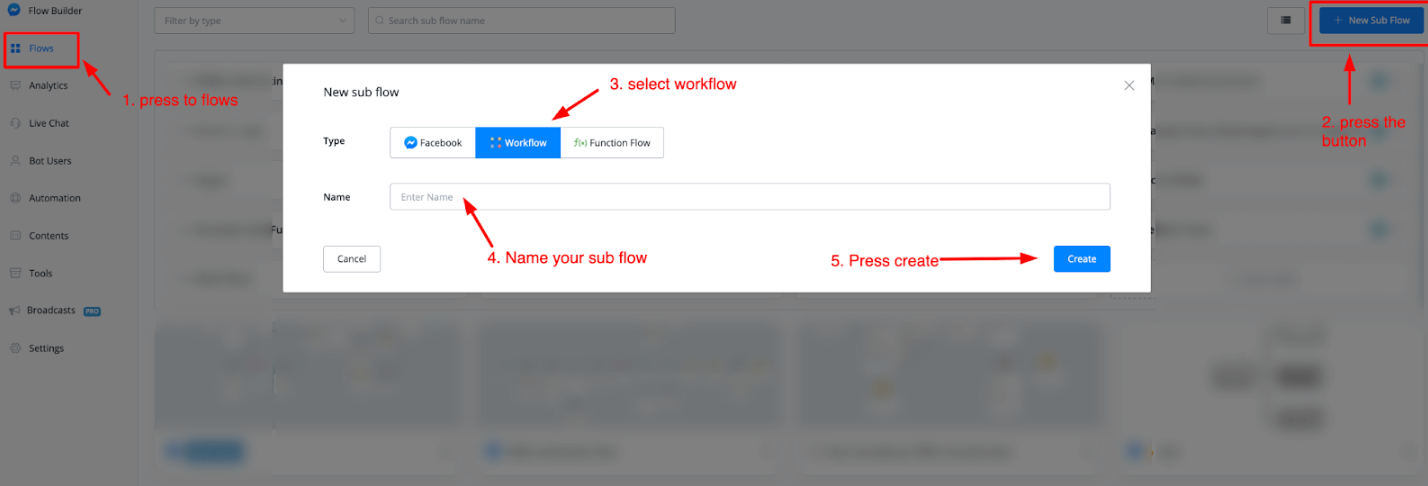
Select the workflow flow type then give it a name. Once done press the button Create to start creating your workflow.
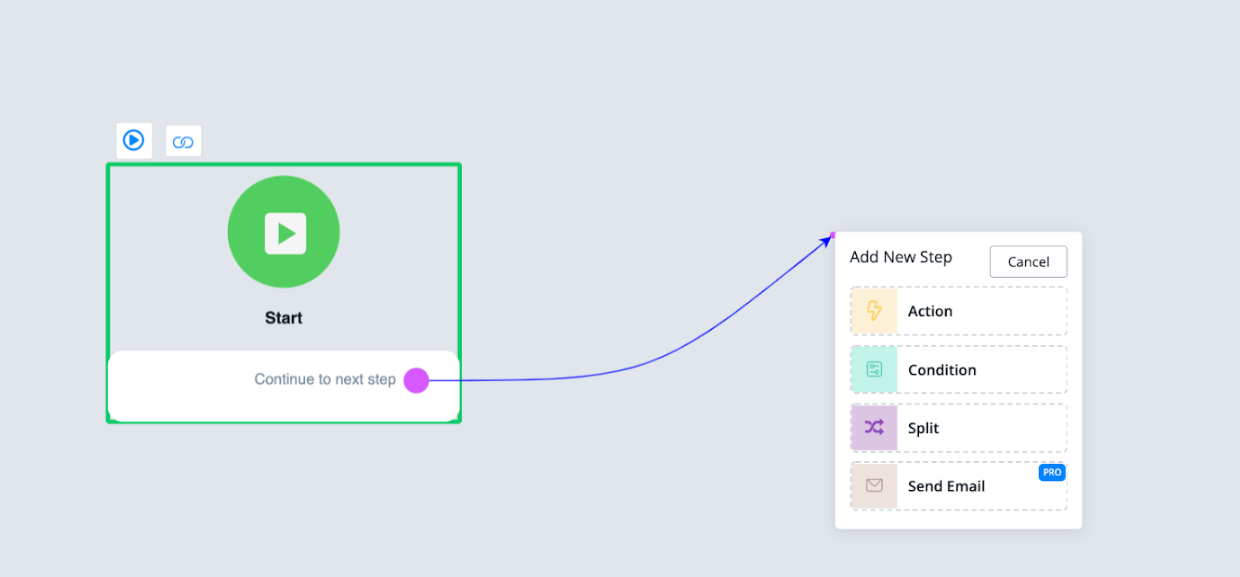
Once you create your flow and you end up in the flow builder you will notice that you will have access to fewer blocks than when selecting a regular or function flow.
Available blocks are:
- Action
- Condition
- Split
- Send Email
As mentioned this flow is meant to create a backend flow that you can trigger from any other flow inside your chatbot to handle system tasks like adding tags, set custom fields, but also sending emails.
Workflow Example
Let’s take an example of how a workflow can be used.
A user signs up with an email and or phone number and you want to sync this information with your CRM platform of choice.
So soon as you grabbed the credentials from the user you can make an API call using the external request block inside of the action module.
You would also want to tag the user inside the chatbot for completing the onboarding step. After done we send an email notification to an admin that a new lead has been created to follow up on.
A workflow can then look something like this
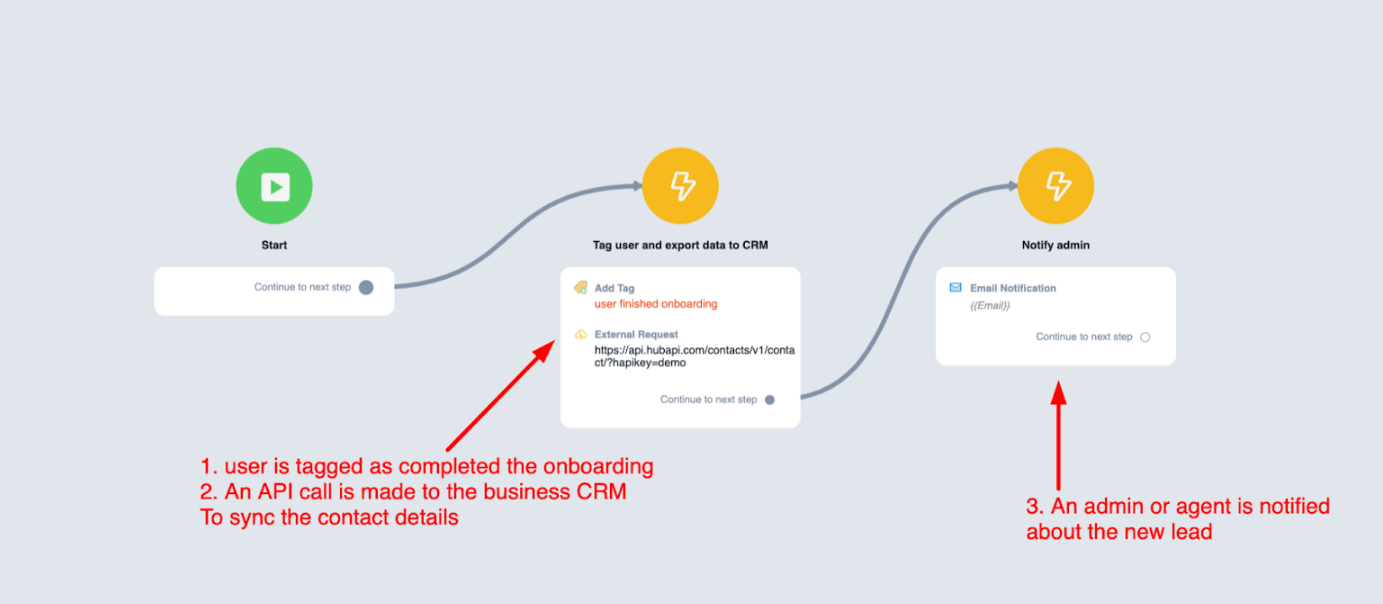
If you were to incorporate this into the flow that has the actual conversation it might become an issue as the conversation could be on hold for several seconds or more to finish all these system processes. And you might lose the user as he or she thinks the conversation is done.
Trigger Workflow
It is very simple to trigger the above workflow inside of any other flow that you build.
Just insert an action block, go to advanced actions, then choose trigger workflow at the bottom
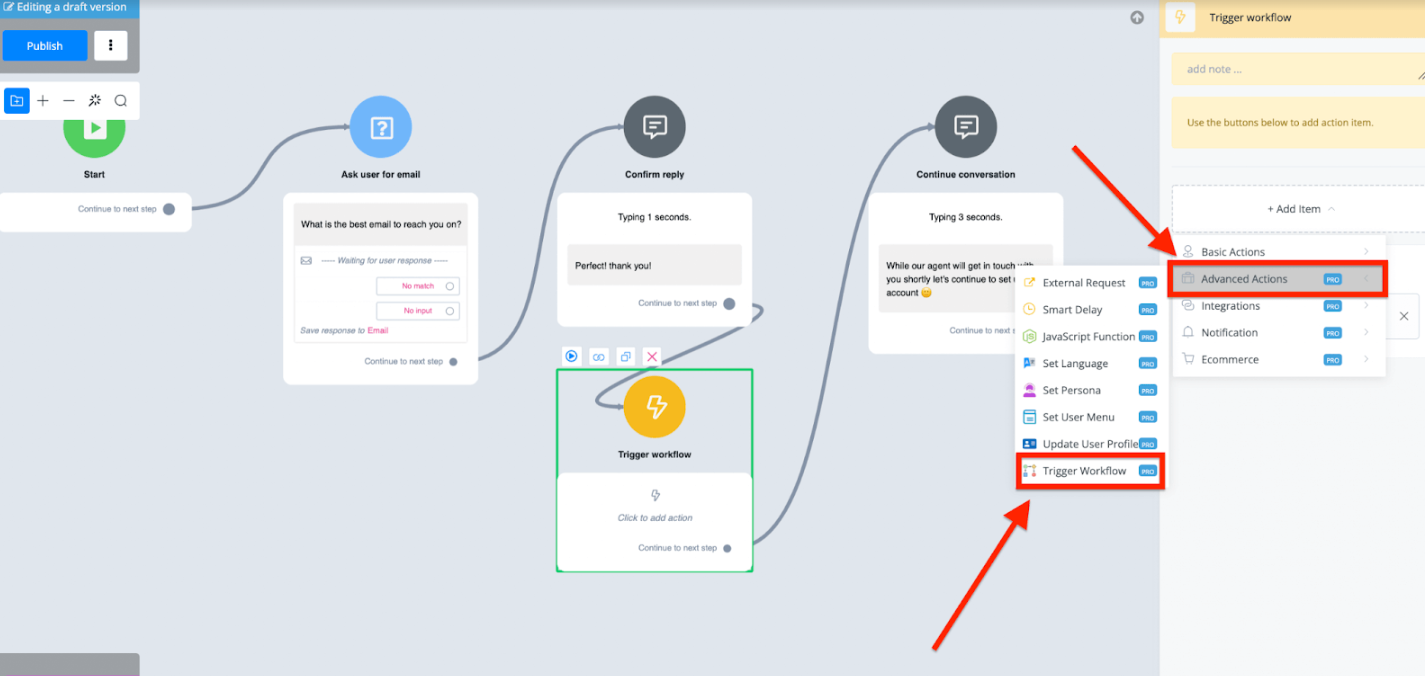
You can then select any workflow you created. This workflow will then be processed in the backend while the conversation with the user will not be affected and continue without any delay.
Function flow
Function flow is better for reusable flow, which handles the common logic and returns back the results via output node. For example, you can use it to check the business hours and then route to different output based on the business hours.
also you can check if user has specific tag or not, and then you may follow up to different questions based on result. The key benefit is if you have may sub flows need to handle similar logic, then by using the function flow, you will be able to manage the logic from one single flow, it is easy to maintain and make changes.
A function flow is a fantastic way of preventing you to create repetitive flows over and over again. Think of when you need ask for emails or phone numbers.
With a function flow you will be able to send the user to that one flow, then once completed the user can continue exactly from the point they left off in the previous flow.
Create Function Flow
To create a function flow go to Flows from your left-hand menu, then press the button + New Sub Flow.
Select the Function flow type and name your flow. Once done press the button Create and you will be taken to the flow builder.
Function Flow Example
Once inside the flow builder and wanting to insert a new block you will see that you have all the blocks at your disposal just like in a regular flow, and one extra called Output.
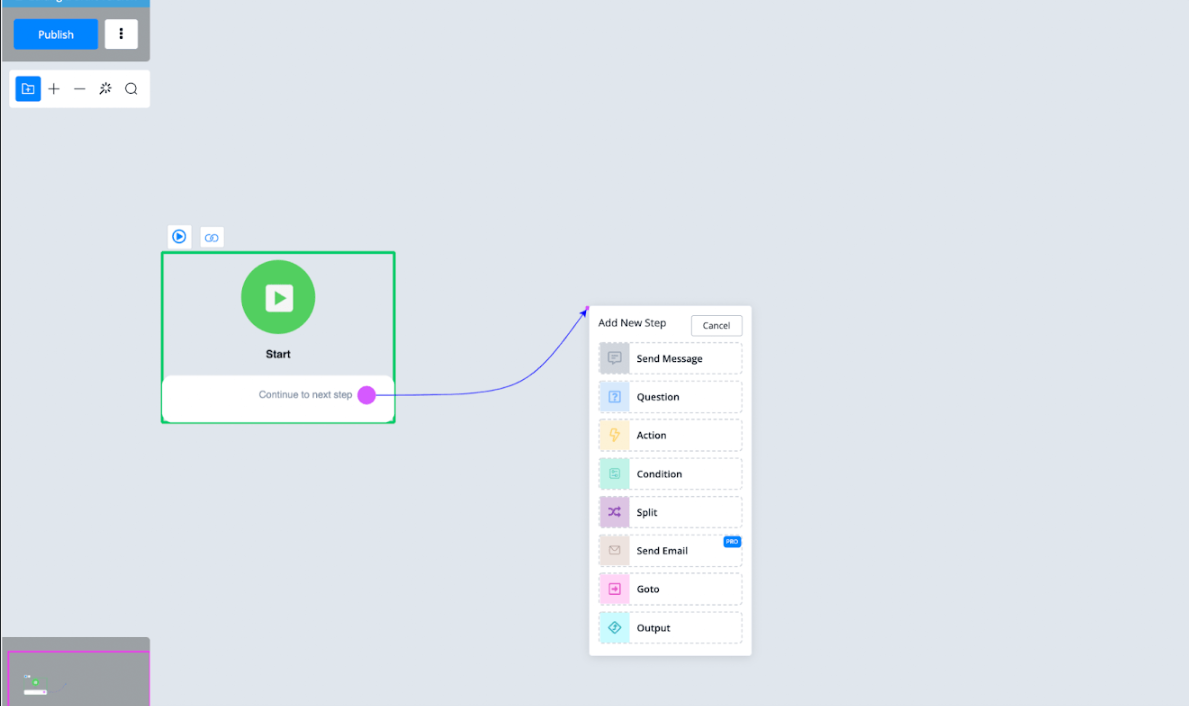
This output is what makes this function flow so unique as it gives you the ability to send the user back to the previous flow (if you like) exactly where he or she left off.
Let’s create an example where we ask the user for an email and add an output module to it;
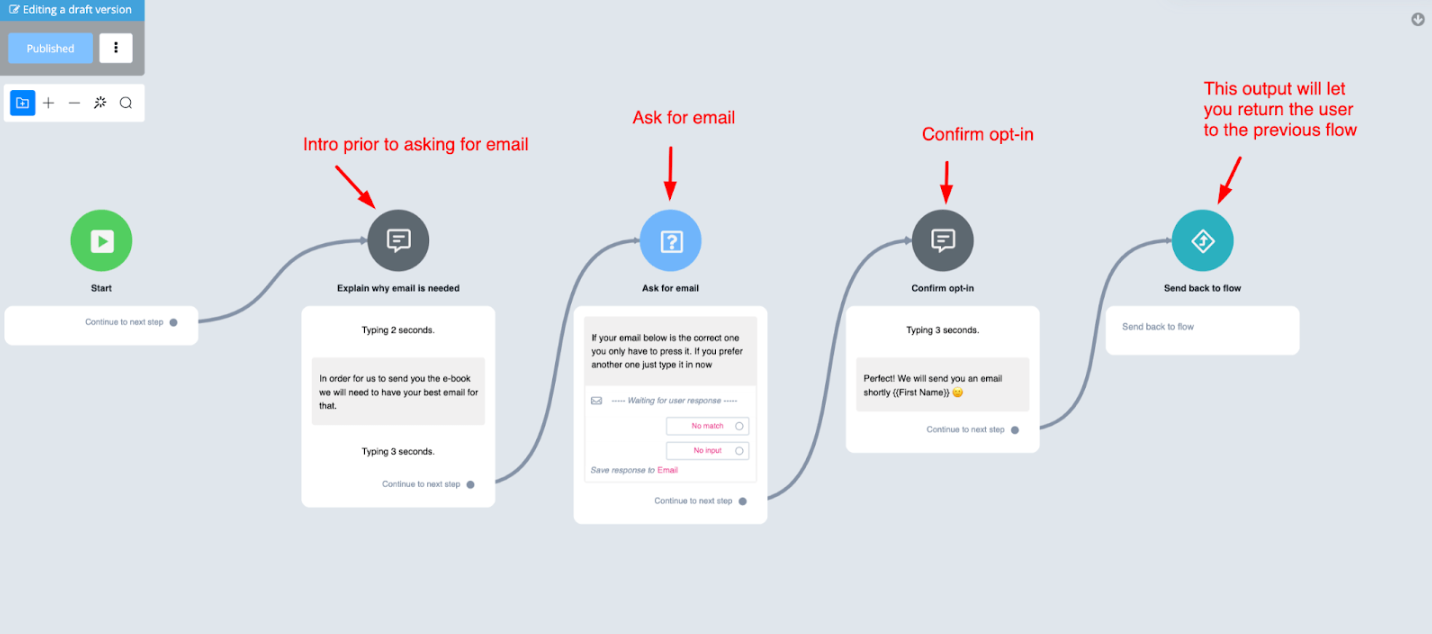
As you can see a simple flow but with the benefit this is the only function of the flow, asking for an email.
Call Function Flow
After this flow is finished you can return the user to the previous flow to continue the conversation there if you like.
Let us show you how that could look like;
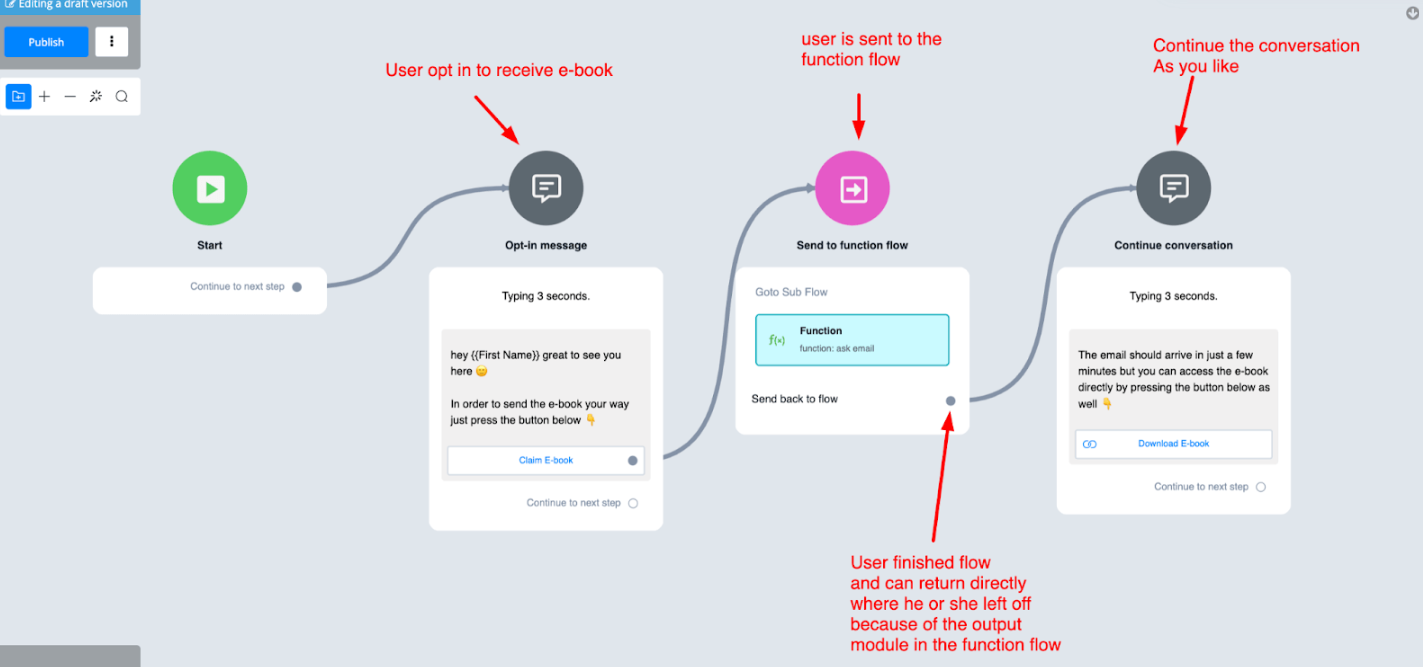
There are many use cases for function flows so you can get as creative as you like.
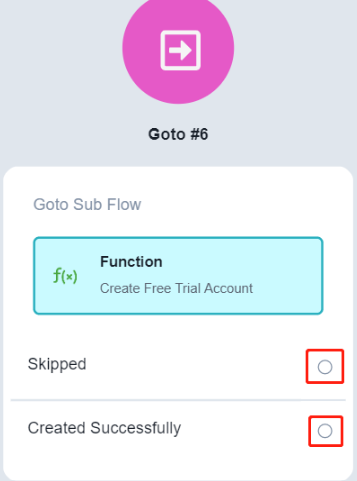
Multiple Outputs
Multiple Output Steps are supported in your Function Flow.
When you call a Function Flow with multiple outputs, the titles of those outputs will show in the Goto Step and you can handle it accordingly.