Stripe
Setup Stripe
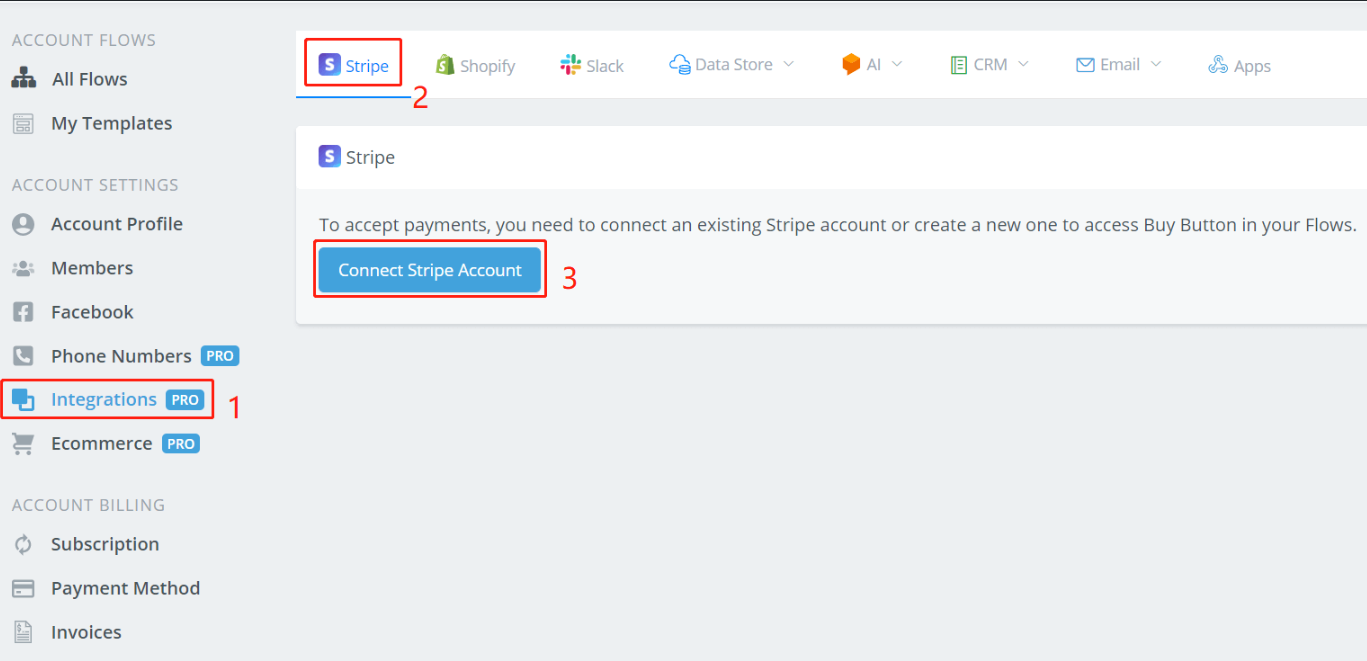
Click 1, 2 and 3 in order on your Messagingme.app dashboard.
On Stripe’s website, log in yourself, select the account you’d like to connect to (create an account if you don’t have one yet). Then you will see this:

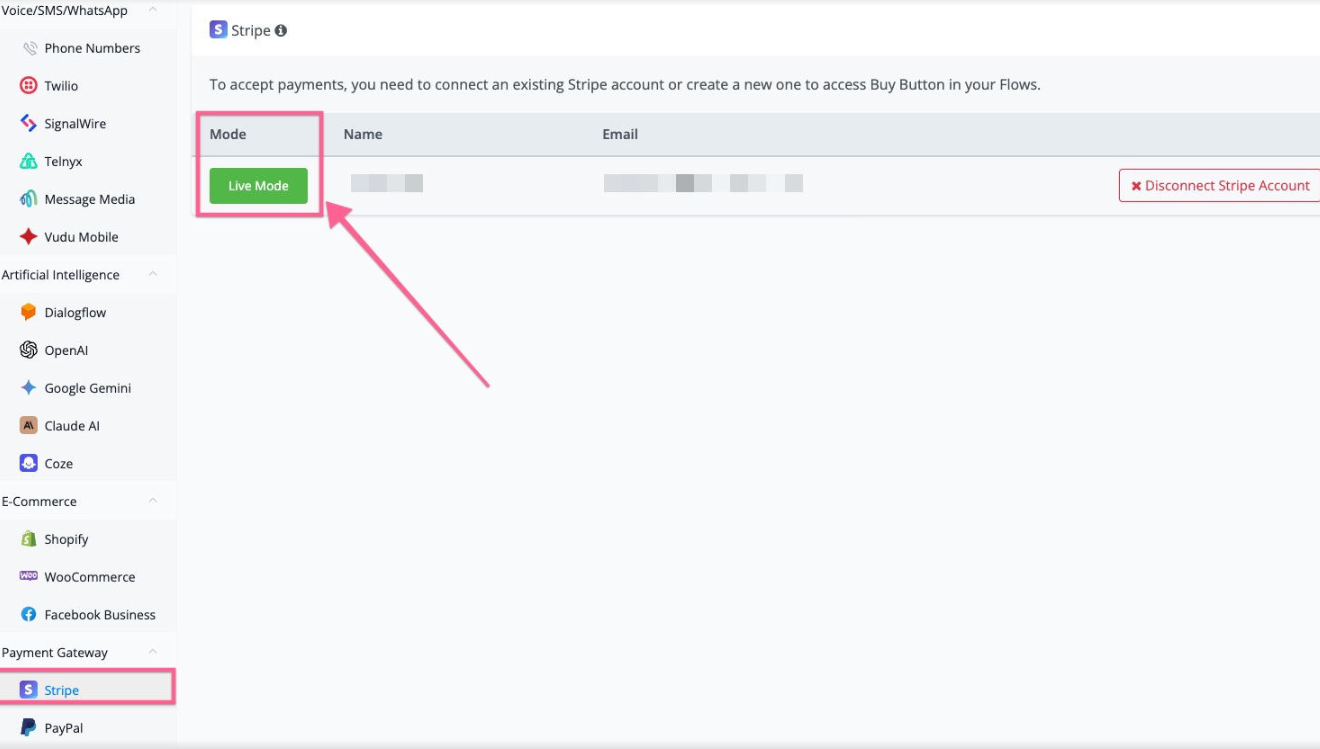
Click on the green button to change it from “Live Mode” to “Test Mode”.

When you are under the “Test Mode”, you can test the checkout process without paying a real bill. The checkout page will look like this:

Press the “AUTHORIZE TEST PAYMENT” button to see what will happen when the payment is successful. Instead, pressing the “FAIL TEST PAYMENT” button is simulating the situation that the payment fails. When everything is tested perfectly, click the “Test Mode” again to flip back to the “Live Mode”, then you can receive real payment from users!
More information click -> Stripe Docs
Stripe API
You can find “Stripe API” in the action → Integration, and here is a list of available actions:
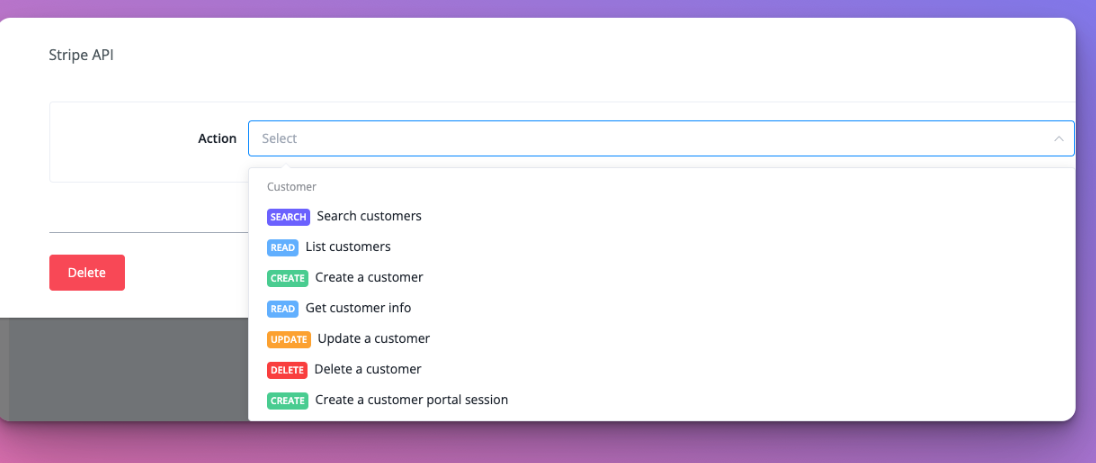
- Search customers
- List customers
- Create a customer
- Update a customer
- Delete a customer
- Create a customer portal session
Stripe Trigger
You will find the Stripe Invoice Payment Succeed & Stripe Invoice Payment Failed trigger in the detail link below:
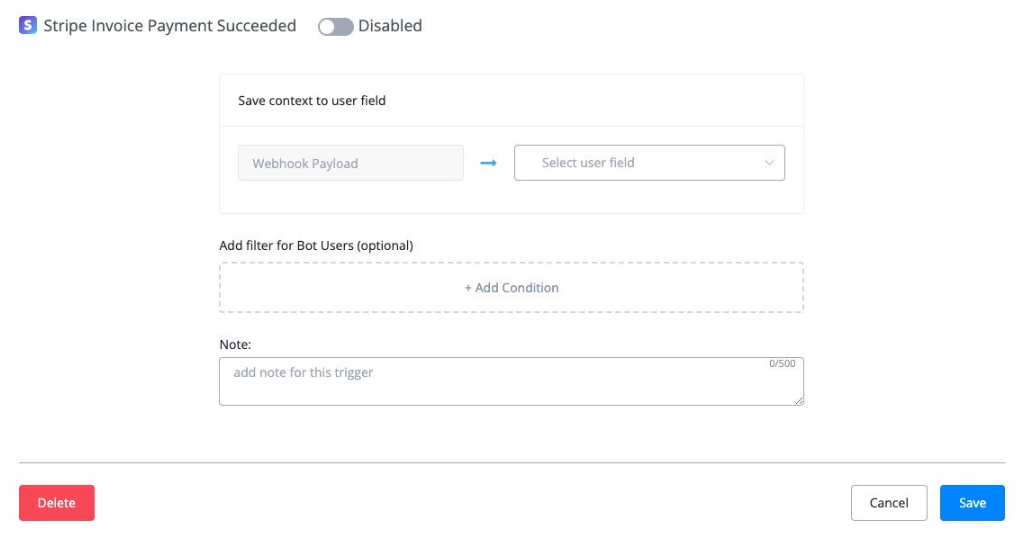
Stripe Invoice Payment Succeeded
This is the trigger that works with Stripe subscription payment. This is the trigger for the first payment of the subscription.
You will need to first connect your Stripe account in the integration, and turn the mode to “Live”
You can create a Stripe subscription in the Messagingme.app flow builder.
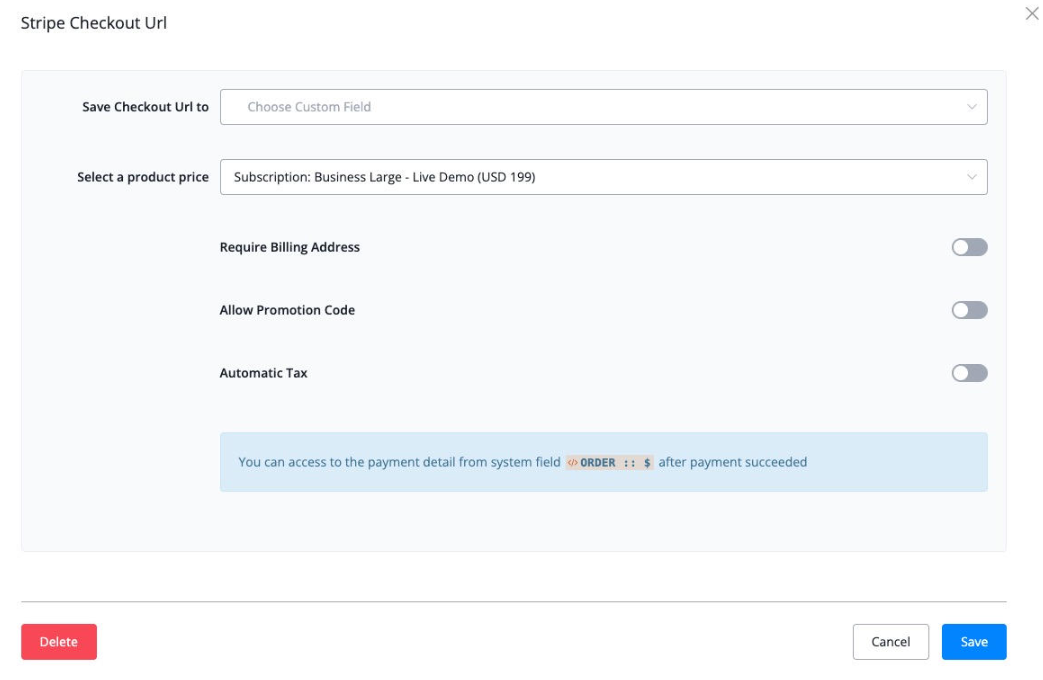
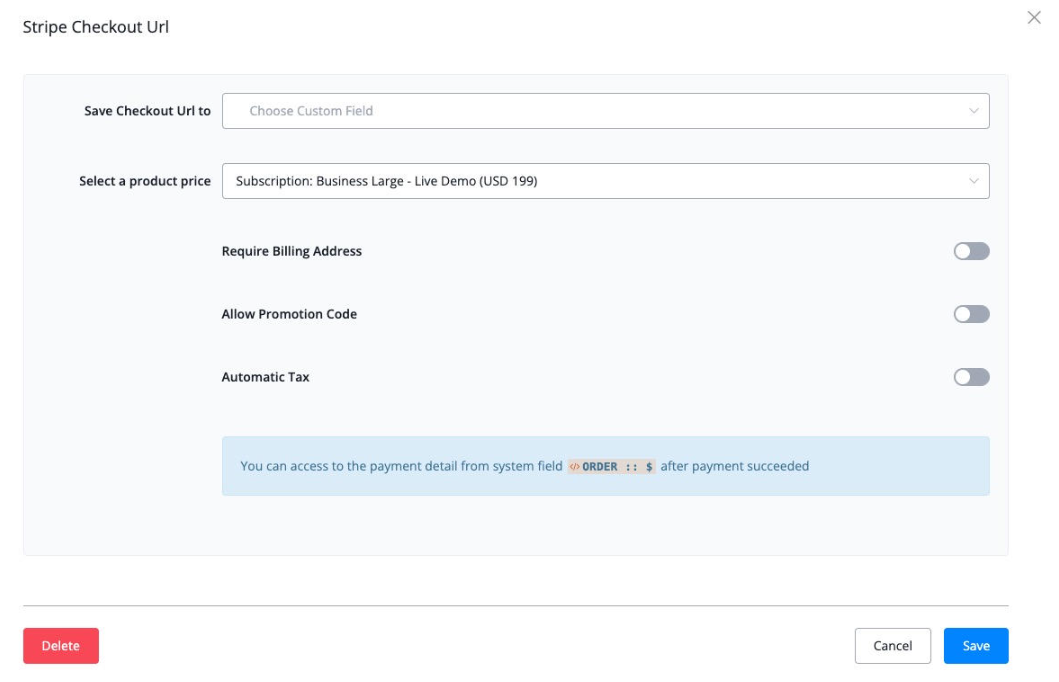
You can go to the “Action” → “Ecommerce” → Stripe Checkout URL.
If your Stripe account have subscription products, and you will see the subscription in the dropdown as the screenshot below
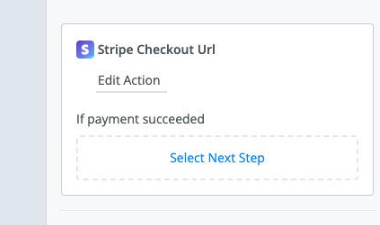
If the Stripe payment is one time payment or subscription, you can connect/select next step by using “if payment succeeded”
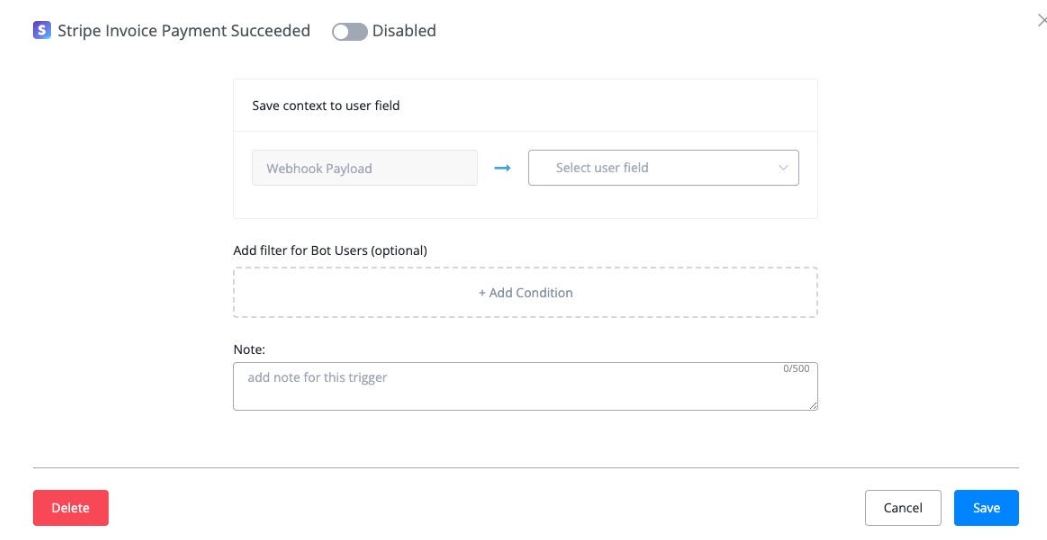
If the future recurring payment failed, you will need to set up automation by using “Stripe Invoice Paymant Failed” trigger.
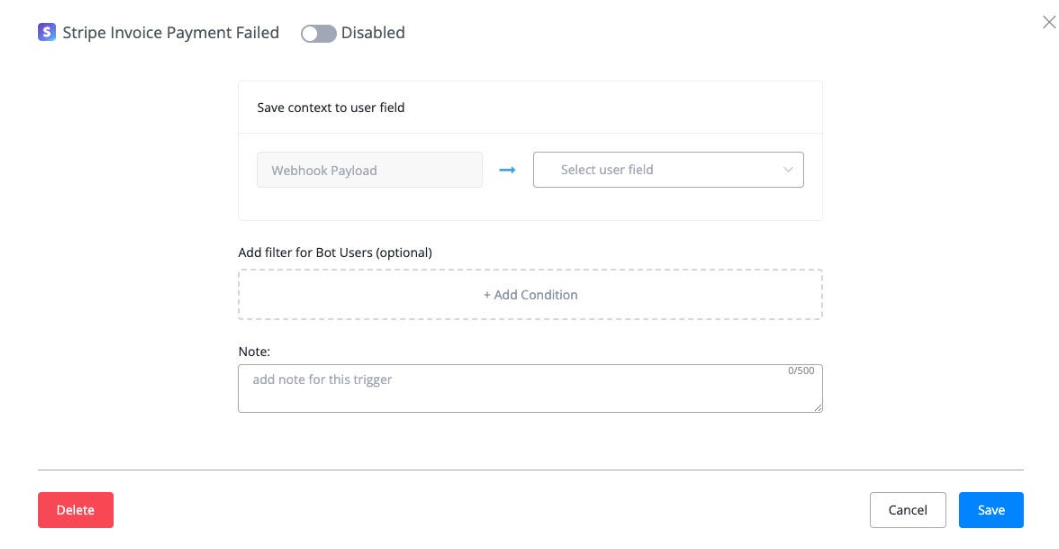
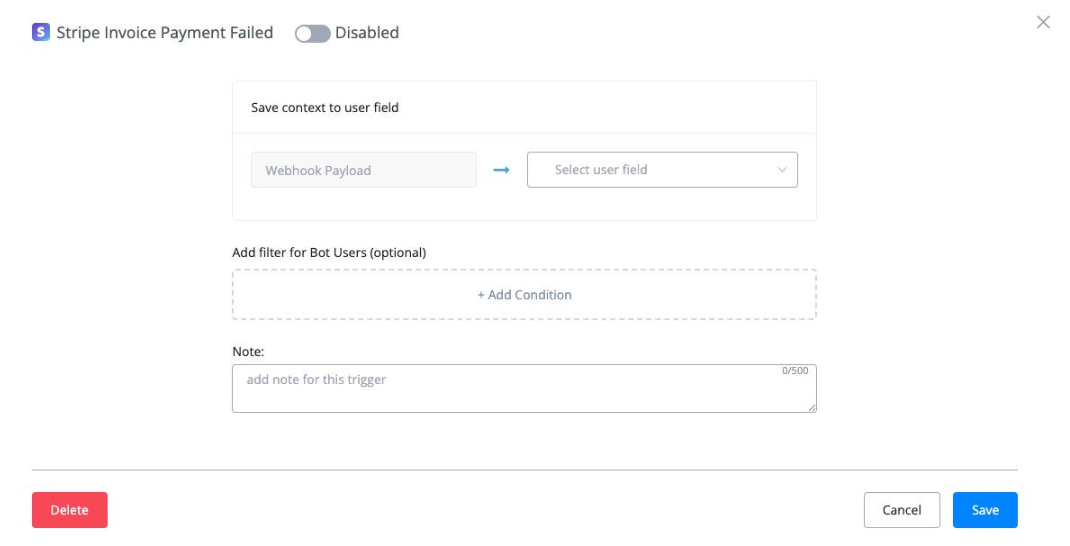
Stripe Invoice Payment Failed
This is the trigger that works with Stripe subscription payment. This is the trigger for the first payment of the subscription.
You will need to first connect your Stripe account in the integration, and turn the mode to “Live”
You can create a Stripe subscription in the Messagingme.app flow builder.
You can go to the “Action” → “Ecommerce” → Stripe Checkout URL.
If your Stripe account have subscription products, and you will see the subscription in the dropdown as the screenshot below
If the Stripe payment is one time payment or subscription, you can connect/select next step by using “if payment succeeded”
For the future recurring subscription success payment, you will need to select “Stripe Invoice Payment Succeeded” Trigger to trigger the automation you want.
If the future recurring payment failed, you will need to set up automation by using “Stripe Invoice Paymant Failed” trigger.
Stripe Checkout URL
You can also build a Stripe dynamic checkout page right inside of our flow builder
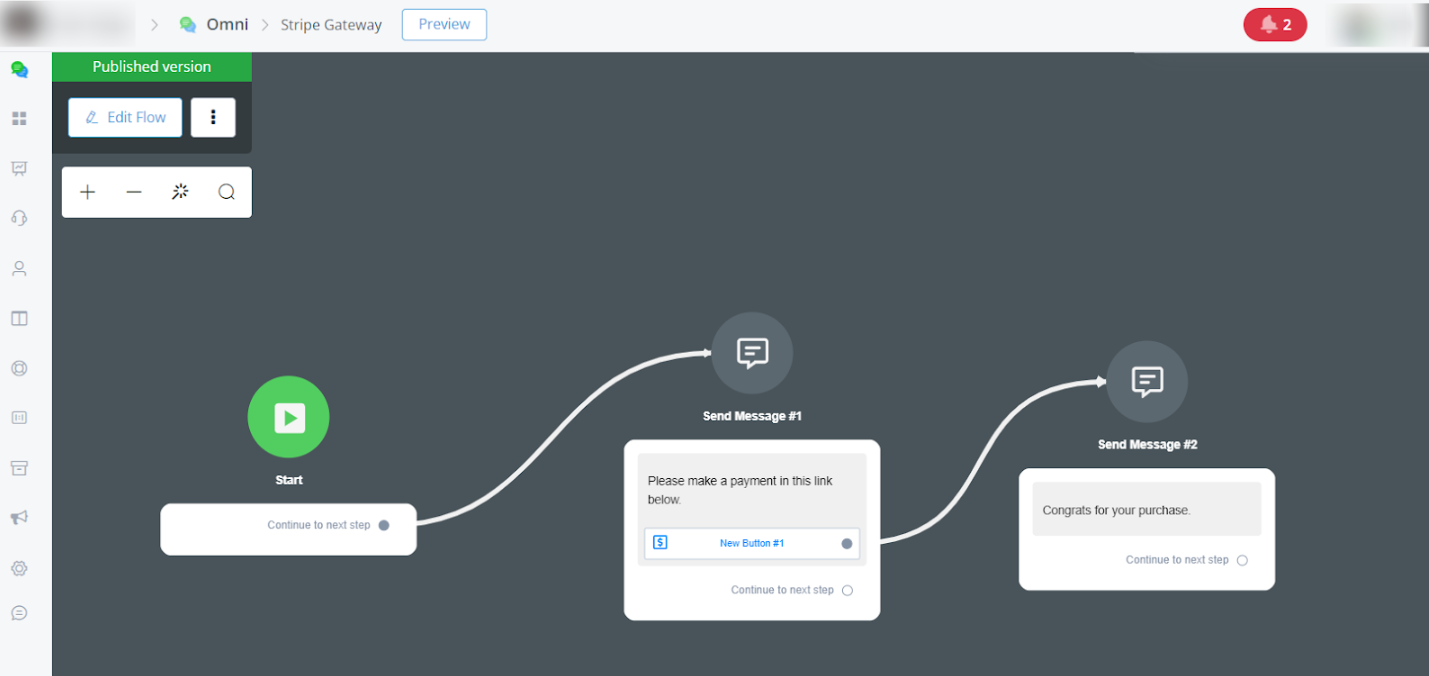
Integrating Stripe as a payment gateway in Messagingme.app allows you to securely process payments directly within your chatbot flows. This guide will walk you through the steps necessary to set up Stripe, create a seamless payment flow, and configure the essential elements to ensure a smooth user experience. Whether you’re selling products, services, or subscriptions, these instructions will help you get started quickly and efficiently.
Setting Up Stripe in Messagingme.app:
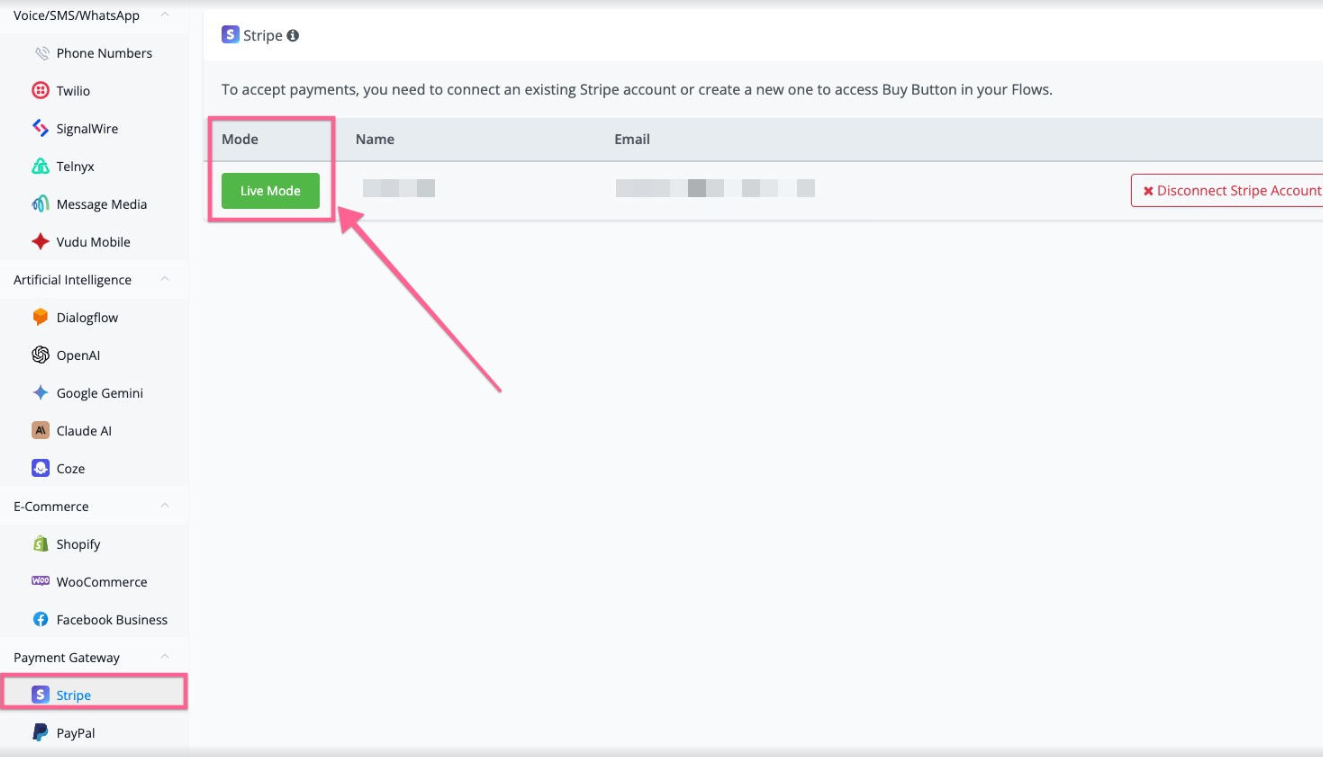
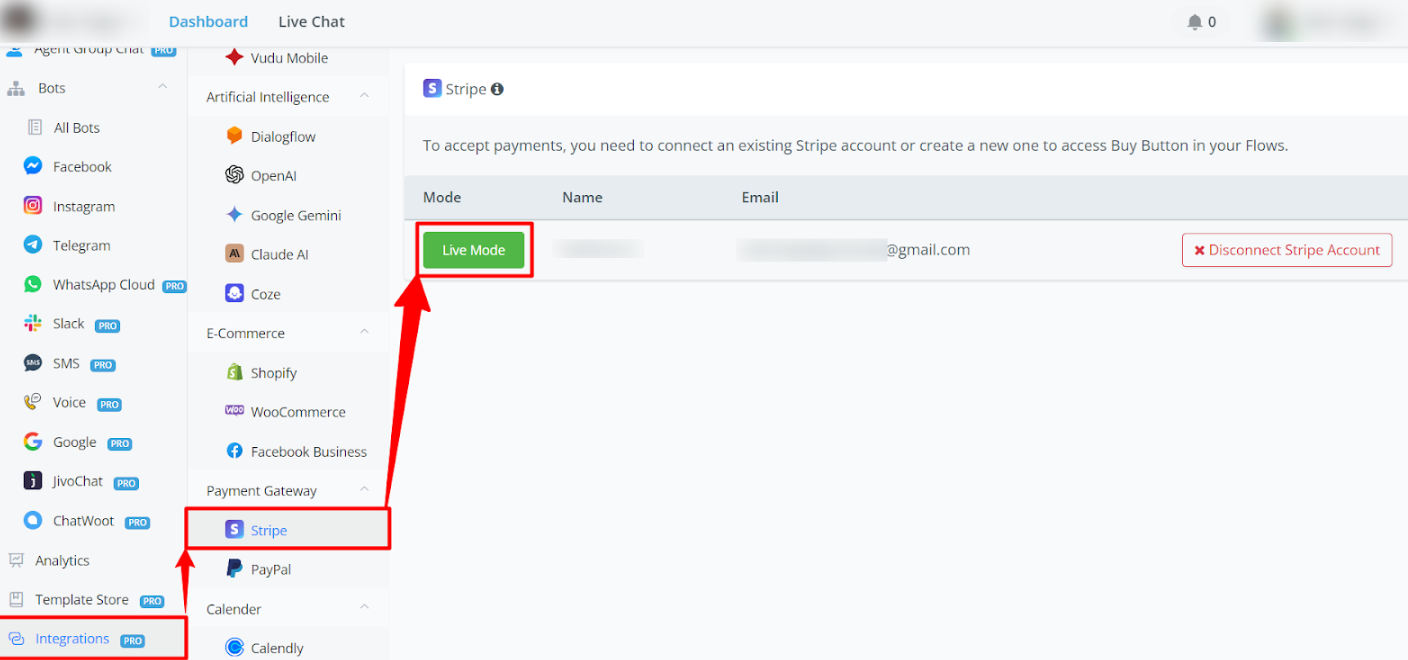
- In the sidebar menu, go to the “Integrations” section.
- Click on “Payment Gateway” and select “Stripe.”
- Ensure that the mode is set to “Live Mode” to accept real payments. If you haven’t connected a Stripe account yet, do so at this stage.
Creating the Payment Flow:
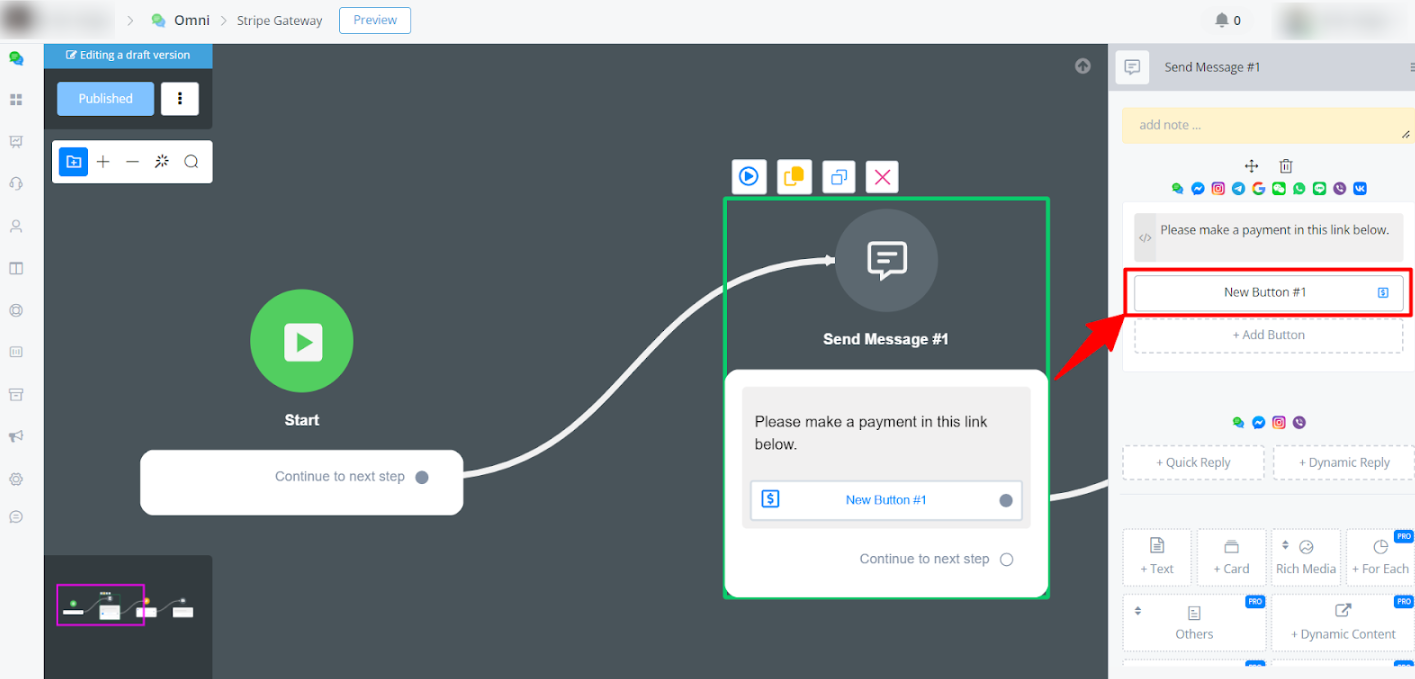
- Access the flow builder area and select or create a new flow where the payment will be integrated.
- In the flow editor, add a message block by clicking “Send Message” and configure the message to be sent to the user, such as “Please make the payment using the link below.” for example.
Configuring the Payment Button:
- In the message block, click “Add Button” to add a payment button.
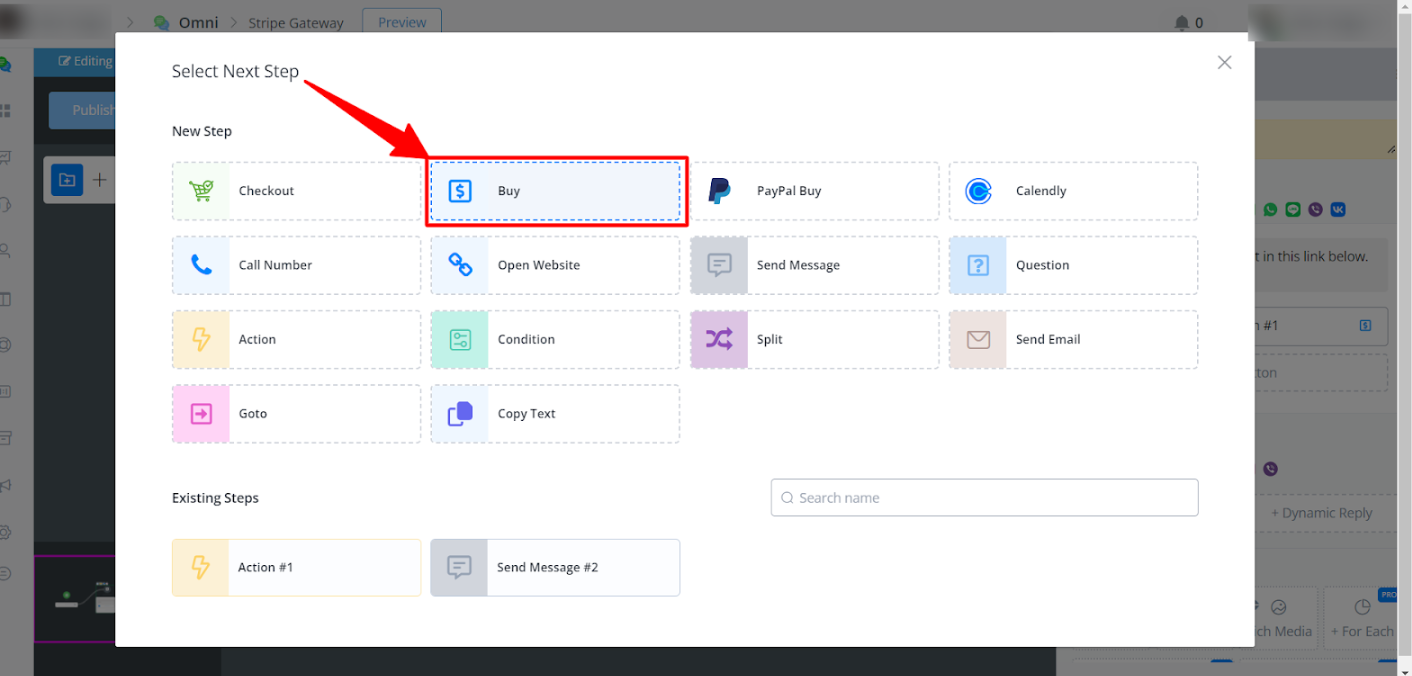
- Select the “Buy” action from the list of available actions for the button.
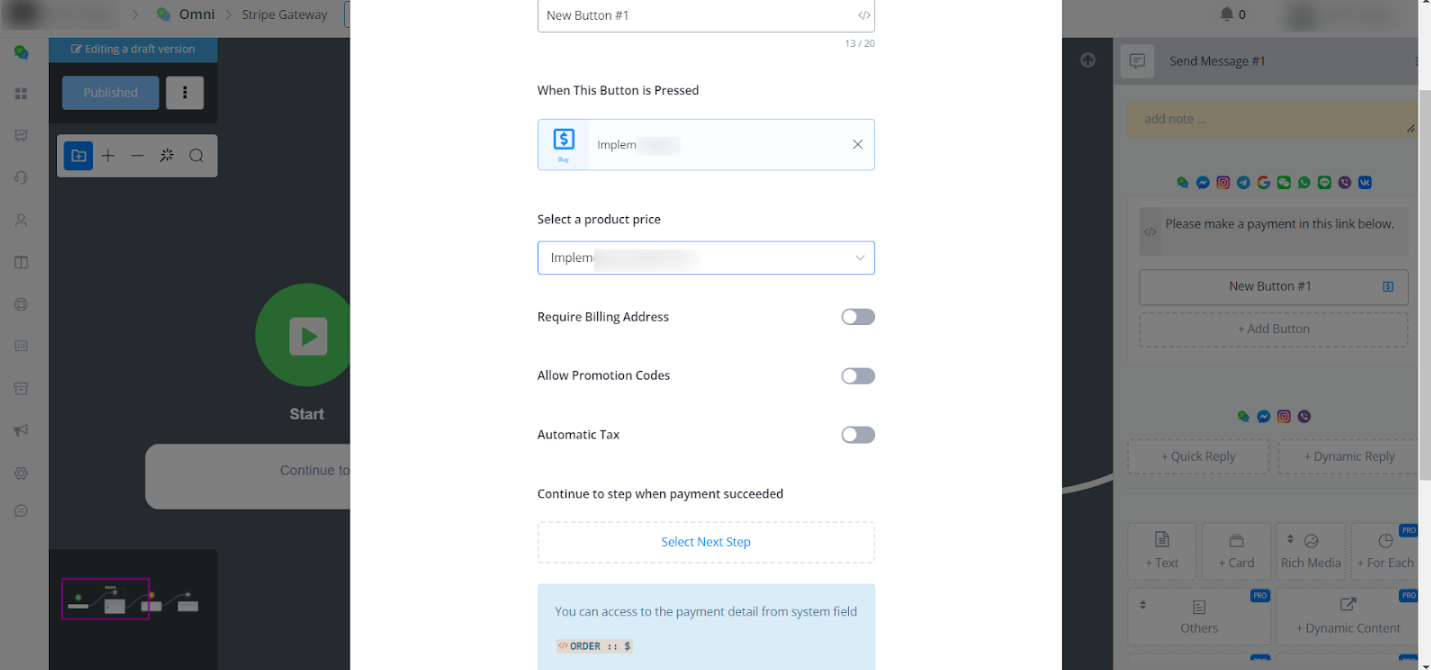
- In the button configuration, give the button a title, such as “Pay Now.” for example. Under “Select a pre-set price,” choose the product or service for which the payment will be made. If you haven’t set up products beforehand, select “Custom Product” and manually set the price.

- If necessary, configure additional options such as “Require Billing Address” or “Allow Promotion Codes.”
Finalising the Flow:
- After configuring the payment button, define the action the bot should take after the payment is successfully completed. This could be sending a confirmation message to the user or continuing to the next step in the flow.
- Publish the flow by clicking “Publish” so that it is active and ready for use.